DIY note
Paint a Watercolor Swan
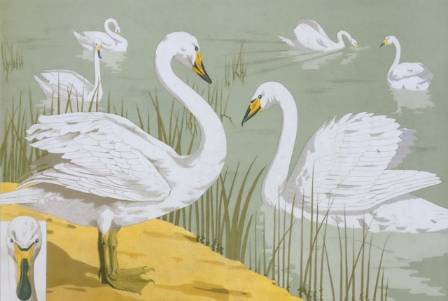
Having traveled to many countries, one of my most cherished memories is visiting Hyde Park in London. During that trip, we took a serene boat ride across the park’s lake, which was gracefully dotted with elegant swans.
Aria Sullivan
Maker
Bench tip
Read the full note below and keep tools nearby.
Shelf
Hobby build
Having traveled to many countries, one of my most cherished memories is visiting Hyde Park in London. During that trip, we took a serene boat ride across the park’s lake, which was gracefully dotted with elegant swans.
That tranquil scene always comes to mind whenever I think of lakes. From an artistic standpoint, painting grayscale birds can be challenging, as their muted tones may make the artwork appear flat. To enhance visual interest, we will incorporate contrasting colors into the piece.
Step 1: Gather Your Supplies
Materials:
Cold-press watercolor paper (200 gsm / 95 lb)
Pencil
Kneadable eraser
Palette
Glass jar for water
Watercolor mop brush, size 000
Round brush, size 4
Script liner brush, size 0
Tissue paper
Step 2: Select Your Colors
Palette:
Ivory Black
Bright Orange
Ultramarine Blue
Indigo Blue
White acrylic paint
Step 3: Sketch the Swan
Lightly sketch the swan on the cold-press watercolor paper using a pencil. Focus on the overall proportions first. Begin with an oval or egg-shaped body and a smaller oval for the head. Connect the two with gentle S-shaped curves to form the neck. Draw a small triangle for the beak. For the wings, use simple U-shaped forms, repeating the style for the tail feathers. Once satisfied with the layout, erase any heavy pencil lines with a kneadable eraser.
Step 4: Lay Down the Base Wash
Start with the first paint layer. Using a round brush loaded with a diluted ivory black wash, gently fill in the swan’s body. Blend softly at the tips of the wings and along the neck for a subtle gradient. Use clean water to smooth transitions on the head and neck areas. Allow this layer to dry completely before continuing.
Step 5: Add Feather Details
For the next layer, create more defined feather shapes using a medium gray wash (ivory black mixed with water). Paint U-shaped and U-outlined strokes across the wings and tail.
Pro Tip: Start with small strokes near the base of the wings and gradually move to longer shapes toward the wing tips.
Use a script liner brush with ivory black to paint a V-shape near the eye and along the lower beak. Switch to bright orange for the upper beak. Let this layer dry before proceeding.
Step 6: Introduce Contrasting Outlines
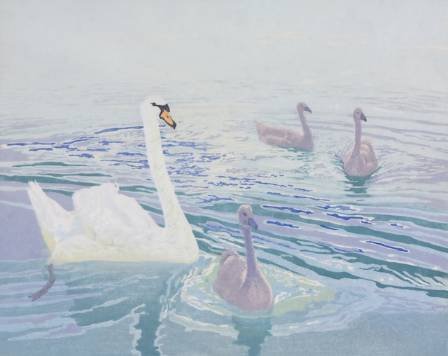
Once the swan is dry, outline the bird with ultramarine blue to add contrast and vibrancy. Leaving small gaps in the outline enhances the artistic effect and adds visual interest.
Step 7: Enhance with Gradient and Details
Apply a dual-color gradient wash behind the swan, blending deep indigo into ultramarine blue using a mop brush. Let it dry.
Next, with a clean round brush and white acrylic paint, create soft wave patterns around the swan by alternating thin and thick strokes. Rinse the brush and add bright orange accents in small clusters of circular or spoke-like elements to brighten the composition.
Nearby projects

· en
Top 10 Classic Salads (From Caprese to Grilled Chicken Salad)
Molly McArdle
· en
5 Interesting Facts About Seals
Kevin Abrams
· en
The Great Historical Transformation and Unstoppable Economic Evolution of Singapore
Rosalie Whitaker
· en
The Familiar Wild Duck of the Northern Hemisphere
Nessa Beaumont

· en
The Pinnacle of Luxury: 7 Prestigious Clothing Brands
Penelope Sage
· en
Arctic Sea Ice Shrinks To Lowest Winter Level Ever As Unprecedented Global Heat Shatters Records
Parker Lillian