DIY note
The Secrets of How to Paint a Beach
Painting a beach scene brings the relaxing, vibrant energy of the ocean to life on canvas. Imagine the rhythmic crashing of waves, the salty breeze, and the warmth of sunlight. With some guidance and step-by-step instruction, you can create your own beach masterpiece.
Damien Ashford
Maker
Bench tip
Read the full note below and keep tools nearby.
Shelf
Hobby build
Painting a beach scene brings the relaxing, vibrant energy of the ocean to life on canvas. Imagine the rhythmic crashing of waves, the salty breeze, and the warmth of sunlight. With some guidance and step-by-step instruction, you can create your own beach masterpiece.
Step-by-Step Beach Painting Guide
Seascapes are an exciting subject for artists of all levels. Follow these stages to build a complete beach scene:
Step 1 – Practice Basic Shorelines
Step 2 – Learn to Paint Waves and Water Movement
Step 3 – Understand Ocean Hues and Lighting
Step 4 – Complete a Full Beach Composition
Step 5 – Add Final Details and Enhancements (upcoming lessons will expand on this)
Materials for Beach Painting
You can use oil paints, alkyds, or acrylics. Alkyd paints are a personal favorite because they combine the slow drying of oils with the faster drying properties closer to acrylics.
Canvas: A smaller canvas such as 11x14 inches is ideal for practice. Canvas boards also work well for learning.
Brushes: Flat brushes are recommended for seascapes. Brush sizes should be chosen relative to your canvas. For this painting, #2, #4, and #6 flat brushes were used.
Clean-up: Use Gamsol or other odorless mineral spirits for cleaning brushes with oils or alkyds.
Colors:
Cadmium Yellow or Indian Yellow
Alizarin Crimson
Burnt Sienna
Cerulean Blue
Viridian Green
Arrange your colors from warm to cool with plenty of white. Mix a neutral dark with Cerulean, Burnt Sienna, and a touch of Viridian to tone down vibrant colors as needed.
Sketching the Composition
Begin with a light sketch on your canvas. Thinned yellow paint works best since it’s easy to cover later. Pencils are optional; if you use one, pick a hard pencil to avoid dark graphite marks that are hard to cover.
Divide your canvas into thirds using faint lines. The horizon should sit about one-third from the top, and the sun can be placed at the intersection of the third lines. This helps with balance and composition.
Painting the Sky
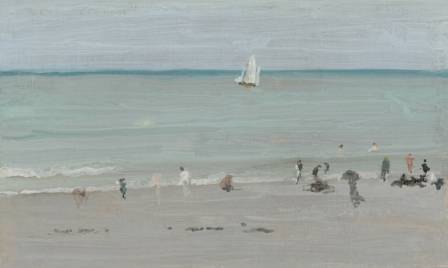
Start with a sunlit sky, placing the sun just above the horizon. Mix your colors with white and use only a small amount of medium or solvent.
Begin in the upper right with a blend of Cerulean, a touch of Viridian, and Burnt Sienna. Gradually add more white toward the horizon. Around the sun, paint soft yellow, and create orange tones with Alizarin Crimson and yellow for areas further away.
For clouds, dab unthinned paint close to the sun with orange, and apply your neutral mix farther out. Blend gently with a dry brush, wiping off excess paint between colors. Avoid using a wet brush with solvent for blending, as it can lift paint.
Blocking in the Colors
Cover the canvas with base colors to help see values clearly. Thin your paint slightly with your medium.
Water: Mix Cerulean and Viridian with a bit of your neutral mix, adding white to achieve your desired tone. Paint from the horizon downward, varying strokes and leaving some areas of canvas showing for texture.
Beach: Reflect sky colors on wet sand using yellow, Burnt Sienna, and white. Add touches of Cerulean or neutral mix to tone down colors in shaded areas. Blend gently, keeping the bottom edge slightly darker to anchor the composition. Leave areas for foam to be added later.
Adding Dark Tones
Use pure Cerulean and Viridian to paint dark areas in the ocean, especially beneath wave crests. Apply these darks intermittently rather than across the entire wave width.
Add subtle darks to the sand to represent areas beneath the foam. Squint your eyes to check values and balance.
Highlighting Waves and Foam
Create white caps using warm white, mixed with a hint of yellow or Burnt Sienna. Hold the brush parallel and lightly touch the canvas, allowing natural shapes to form. Blend the bottom edges softly while leaving tops crisp.
For foam along the shoreline, mix a cool white with Cerulean and a tiny bit of Burnt Sienna. Paint in the direction of water movement, leaving sand visible in spots. Add shadows under foam using your thinned neutral mix and soften with a dry brush.
Finishing Touches
Paint the sun and its reflections on the water and beach using pure white, blending edges softly. Add final touches to balance colors in the water and enhance foam highlights. Step back and observe your painting from a distance to identify areas that need adjustment. Setting the painting aside for a day or two can provide a fresh perspective.
Painting with Confidence
Now that you know the essential techniques, embrace the process and enjoy creating your beach scene. Painting is about expression, and a sunlit beach is the perfect subject to convey serenity, movement, and color.
Nearby projects

· en
Why Cats Make Remarkable Companions
Samantha Rowan

· en
All About Parrots
Victor Hayes
· en
Fun Facts About Fishes!
Brandon Carter

· en
Verified Facts About Morpho Butterflies
Alexander Thompson
· en
8 Refreshing Alternatives to Water for Ultimate Hydration
Zoey Harper
· en
Dragonflies Are Incredible Predators That Devour Hundreds of Thousands of Local Insects
Bradley Thomas